
After setting up the LED board (HomePi – Starting with the LED board) and proving that it is actually working, it is now time to connect the Pi with the LED board. In this blog Post, we will talk about:
- The Raspberry Pi GPIOs in general
- How to connect the two devices
- Download & use a software that allows to control the GPIOs/LEDs
First things first: The GPIOs
GPIO stands for General purpose input/output. We find them on the Raspberry Pi. A very good source of information is https://www.raspberrypi.org/documentation/usage/gpio/ where we find an image explaining the PIN numbering and location on the board.
The GPIO pins are a physical interface between the Pi and the outside world. At the simplest level, you might think of them as switches that you can turn on or off (input case) or that the Pi can turn on or off (output case).

Not all of the PINs are wired as GPIOs, some of them are power supply others are ground.

The above image can be found at http://wiringpi.com/. The authors of this page and library align the PIN counting with the one known from the Arduino world.
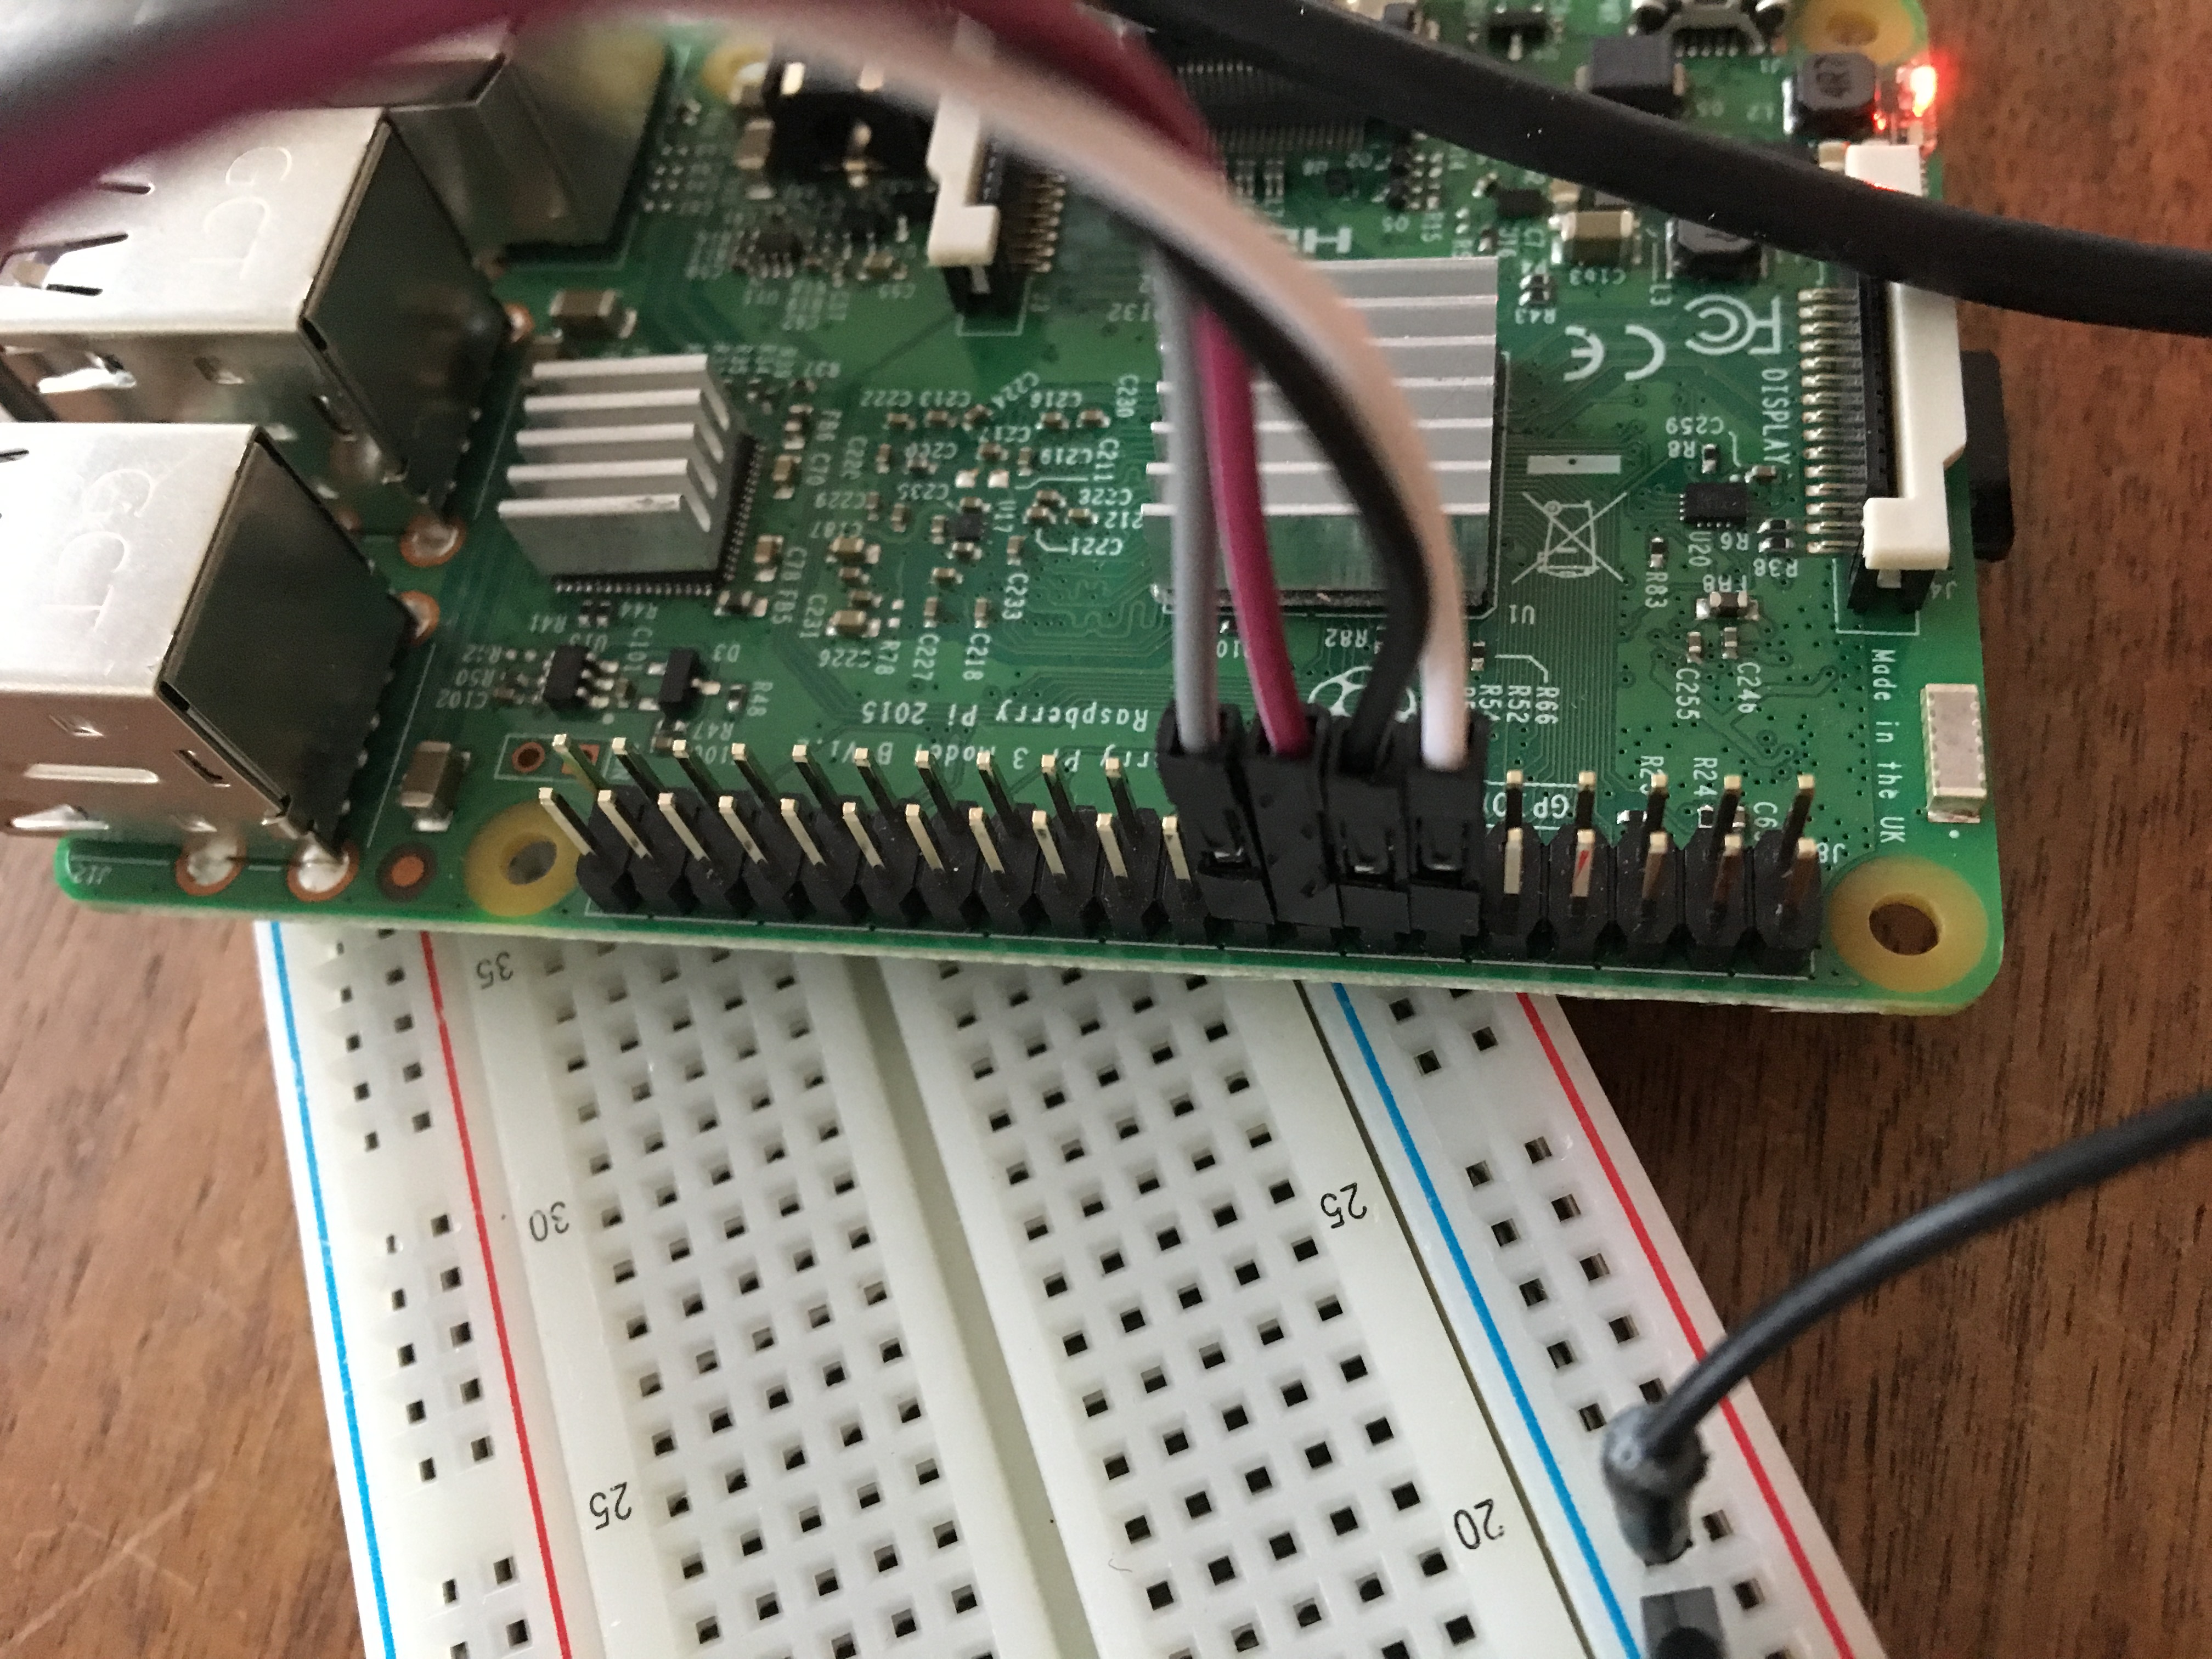
I will connect three LEDs to GPIO1, GPIO4 and GPIO5 (PINs 12, 16 and 18 respectively).
GPIO outputs are easy; they are on or off, HIGH or LOW, 3v3 or 0v. Using GPIOs as inputs is more tricky. But as we focus on outputs for lighting LEDs, the tricky parts shall be omitted for now.
Connecting the LED board to the GPIOs

I chose 4 different wires (right to left):
- white (PIN 12) – GPIO 1
- black (PIN 14) – ground
- dark red (PIN 16) – GPIO 4
- light grey (PIN 18) – GPIO 5
I connect ground to the “-” rail (horizontal) on the LED Board, while I connect the white, dark red and light grey wire to the LEDs power lines (vertical). You can see the wiring in detail below

The test software
The following python script allows testing the GPIOs on the Pi by looping through a sequence of on and off for the GPIOs and the LEDs respectively.
import RPi.GPIO as GPIO
import time

print GPIO.VERSION

#set up GPIO using BOARD numbering
GPIO.setmode(GPIO.BOARD)
GPIO.setup(12, GPIO.OUT)
GPIO.setup(16, GPIO.OUT)
GPIO.setup(18, GPIO.OUT)

try:
    while True:

	# light 12
    	GPIO.output(12, GPIO.HIGH)
    	time.sleep(0.2)
    	# off 12
    	GPIO.output(12, GPIO.LOW)

    	# light 16
    	GPIO.output(16, GPIO.HIGH)
    	time.sleep(0.2)
    	# off 16
    	GPIO.output(16, GPIO.LOW)

    	# light 18
    	GPIO.output(18, GPIO.HIGH)
    	time.sleep(0.2)
    	# off 18
    	GPIO.output(18, GPIO.LOW)

except KeyboardInterrupt:
	pass

# cleanup
GPIO.cleanup()
How to put the software on the Pi
To deploy the software on the Pi, you need to log into the Pi, as most people will use the Pi without a keyboard and/or screen attached, I will explain how to log into the Pi via SSH.
To enable SSH on your Pi, you need to either configure it via the raspberry Pi configuration tools, or – even simpler – just put a file called ssh on the boot partition (https://www.raspberrypi.org/documentation/remote-access/ssh/).
For headless setup, SSH can be enabled by placing a file named
ssh, without any extension, onto the boot partition of the SD card. When the Pi boots, it looks for thesshfile. If it is found, SSH is enabled, and the file is deleted. The content of the file does not matter: it could contain text, or nothing at all.
SSH nito the Pi
After booting the Pi and connecting it to the network, you can use an SSH client to log into the Pi remotely. For Linux and Mac machines this is as easy as opening a terminal and using the ssh comand
You will be asked to accept the Pi’s key. After accepting, you will have a regular shell.
# open a secure remote shell to log into the Pi
MacPro:~ $ ssh pi@raspberrypi
# make a new directory
pi@raspberrypi:~ $ mkdir source
# enter the new directory
pi@raspberrypi:~ $ cd source
# download the led.py script
pi@raspberrypi:~/source $ wget https://gist.githubusercontent.com/wzr1337/d877bf98560b2f389b3d22f3f7121eb3/raw/edce802502aa519cf06c05ed53438424012227af/led.py
# run the led.py script
pi@raspberrypi:~/source $ python led.py
Now enjoy the running traffic lights 😉
More to follow on this blog, stay tuned…